Exposing Toxic Tactics in Technical Environments

The Engineering Anatomy of Bad Faith: Exposing Toxic Tactics in Technical Environments

When you operate with the absolute determinism of an engineer—where systems either work or they don’t, schematics don’t lie, and code compiles based on pure logic—dealing with office politics feels like debugging a corrupted ROM.

If you are an autistic systems designer, an infrastructure architect, or anyone who values raw competence over social theatre, the hardest part of any project isn’t the physics or the code. It’s the humans who actively work against it. When insecure, mediocre, or malicious actors realize they cannot win an argument using technical merit, they don’t suddenly become honest engineers. They escalate.

When transparency and clarity back them into a corner, they deploy a specific catalog of dirty, bad-faith tactics designed to stall progress, protect their turf, and preserve their “black box” monopolies. To survive these operators without burning out on human drama, you have to treat their behavior like documented fault conditions.

Here is a breakdown of eight major bad-faith tactics, complete with real-world examples, what to look out for, and how to neutralize them.

1. Weaponized Ambiguity

  • The Point: Incompetent actors instinctively retreat into the fog. Clarity forces accountability. If a requirement is specific and measurable, everyone instantly knows who is delivering and who is stalling. Ambiguity gives them a place to hide.
  • Point-Proof Example: In a broadcast facility migration, you ask a legacy engineer to sign off on a new ST 2110 IP routing topology. Instead of reviewing the switch configurations or pointing to a packet drop issue, they cross their arms and say, “We just need to make sure we’re looking at the big picture here. I’m worried about the holistic alignment of the facility.” They offer zero concrete metrics, no port numbers, and no schema rules—just a vague cloud of doubt designed to freeze the schedule.
  • What to Look Out For: Vague, unfalsifiable objections (“This feels risky,” “We need more synergy,” “It’s too rigid”) that never reference a specific line of code, a schematic error, or a test bench log. If they cannot point to a quantifiable failure, the objection is invalid.
  • The Fix: Demand telemetry. Force them to translate every vague concern into a measurable parameter or a specific standard clause.

2. The Manufactured “Hair-on-Fire” Crisis

  • The Point: When a project runs smoothly, transparently, and ahead of schedule, it exposes the gatekeeper’s irrelevance. To regain control and center themselves as the “hero,” they manufacture an artificial emergency out of thin air.
  • Point-Proof Example: Two days before a major milestone, a resistant stakeholder suddenly bursts into the lab claiming, “We can’t deploy this wiring harness! The grounding scheme violates legacy safety codes!” They demand an immediate, panicky halt to the entire assembly line. When you demand to see the manual or code standard backing up the claim, they scramble, stall, and admit they “heard it from a guy” or didn’t actually check the documentation.
  • What to Look Out For: Sudden, high-urgency roadblocks raised right before a deadline by people who have been silent for weeks. If an emergency lacks immediate, verifiable telemetry or documentation to back it up, treat it as a stalling tactic.
  • The Fix: Apply the evidentiary burden test. Require immediate test bench logs, packet captures, or code linters to prove the emergency before pausing the assembly line.

3. Strategic Incompetence (Malicious Compliance)

  • The Point: When forced to execute a task they despise or a project they didn’t ask for, toxic operators won’t refuse outright—that leaves an undeniable paper trail. Instead, they execute the task with deliberate, passive-aggressive flaws so they can claim they “tried” while quietly breaking the deliverable.
  • Point-Proof Example: You task a disgruntled technician with wiring a multi-pin connector for a control system, providing a clear pinout diagram. They return it with two wires swapped, causing a short. When you call it out, they shrug, smirk, and play the victim: “Oh well, I’m just not as good at soldering as you guys,” or “You never explicitly told me pin 3 was ground.”
  • What to Look Out For: Sudden, uncharacteristic clumsiness on straightforward tasks from experienced professionals, followed immediately by self-deprecating excuses designed to shift the burden of fixing their mess back onto you.
  • The Fix: Remove subjective execution entirely. Require automated validation, multi-meter continuity test photos, or strict pinout diagrams before sign-off.

4. Gaslighting Through Technical Obscurity

  • The Point: When cornered on a bad design or an outdated architecture, bad actors will invent entirely fictitious technical constraints, manufacturer myths, or physical impossibilities to intimidate you into backing down.
  • Point-Proof Example: You propose modern network automation scripts to update a bank of switch configurations. An insecure gatekeeper looks you dead in the eye and insists, “You can’t run scripts across those switches; the backplane architecture will lock up the management VLAN and brick the hardware.” They say it with absolute, unshakeable confidence—even though it completely contradicts the manufacturer’s RFC documentation.
  • What to Look Out For: Absolute statements about technical limitations that sound authoritative but lack any reference to a datasheet, manual, or standard. When in doubt, pull up the spec sheet on the spot. Synthetic confidence evaporates the moment a PDF is opened.
  • The Fix: Instantly counter with published standards, manufacturer data sheets, or RFC documentation.

5. Scope Creep Ambush (The “By-The-Way” Injection)

  • The Point: Waiting until a design review is nearly finalized, a build is locked, or a deployment window is closing to casually drop a massive, unvetted requirement or objection.
  • Point-Proof Example: You and the team spend three weeks finalizing a bulletproof signal flow or network architecture for a facility migration, and at the final sign-off meeting, they say: “Oh, by the way, did we account for legacy multi-channel analog tie-lines over an old copper patchbay? Because management really wants that included.” They do this not because it’s a vital engineering need, but to force a reset, invalidate your progress, and prove that nothing can finish without their blessing.
  • What to Look Out For: Sudden, late-stage rule changes that lack written backing in the master scope or user requirements.
  • The Fix: Institute the “Change Order Gate.” Any structural addition introduced after the architectural freeze date requires a formal, written change request and impact analysis. If it isn’t in the version-controlled spec doc, it gets deferred to Phase 2.

6. The Credibility Smear (Weaponized Pedantry)

  • The Point: Nitpicking trivial, non-functional details in your work while completely ignoring the core architectural success, using those minor points to publicly cast doubt on your entire competence.
  • Point-Proof Example: You design a flawless, high-reliability AES67 network topology with redundant PTP grandmasters, but they spend twenty minutes in a review meeting publicly obsessing over the fact that a line on a secondary schematic diagram is offset by two pixels or that a text label uses an unapproved font weight. They blow it out of proportion to imply: “If he’s sloppy about this label, who knows what’s wrong with the rest of the system?”
  • What to Look Out For: Disproportionate focus on cosmetic or utterly inconsequential trivia during technical reviews, coupled with a complete silence on the actual hardware or software logic.
  • The Fix: Separate style from substance. Acknowledge the cosmetic fix instantly with zero emotion (“Good catch on the label, I’ll update the tag”), and immediately snap the conversation back to the core architecture: “Now, let’s return to the packet loss metrics and clock synchronization data.”

7. Permission Hoarding (The Bureaucratic Tollbooth)

  • The Point: Using administrative rules, corporate bureaucracy, or arbitrary sign-off chains as a tollbooth to delay your work, while quietly bypassing those same rules themselves when it suits them.
  • Point-Proof Example: When you need a component ordered, a firewall port opened, or a lab access badge cleared, they sit on the paperwork for two weeks citing “compliance reviews.” But when they need a change made, they bypass the ticket queue and pressure IT or management directly. They use institutional red tape as a weapon to starve your timeline.
  • What to Look Out For: Unexplained bottlenecks on administrative approvals where your direct requests stall out indefinitely without technical justification.
  • The Fix: Parallelize and expose. Map out approval dependencies transparently and escalate stalled administrative requests publicly to management with exact timestamps.

8. The “Safety” Alibi (Weaponized Compliance)

  • The Point: Pretending to care deeply about safety, standards, or institutional policy only when it blocks something they personally dislike or didn’t think of first.
  • Point-Proof Example: They have never once checked an electrical grounding bus, an AES48 shield termination, or an EMC compliance report in their lives. But the moment you propose a streamlined new workflow or hardware layout, they suddenly morph into zealous safety inspectors: “I’m just worried about liability and code compliance here,” raising vague, unfounded fears about electrical or structural risk to kill momentum.
  • What to Look Out For: Selective enforcement of rules—they ignore glaring safety or standards violations in their own preferred legacy systems, but demand microscopic compliance for anything you touch.
  • The Fix: Ask for the code clause. Demand the exact statute, engineering standard, or manufacturer specification: “Which section of the NEC, AES, or ISO standard prohibits this topology? Show me the clause.”

The Bottom Line

You do not need to out-politick these operators, and you certainly don’t need to stroke their egos.

When you treat office politics like an uncalibrated circuit—identifying the fault, stripping away the ambiguity, demanding data over drama, and enforcing automated validation gates—the bad-faith actors run out of oxygen. Protect your focus, demand the telemetry, and let the architecture speak for itself.

Engineering Leadership Through Autistic Clarity

Engineering Leadership Through Autistic Clarity

​If you ask most engineers on the spectrum what they think of modern “leadership advice,” the polite answer usually involves a heavy sigh. The unvarnished truth? Traditional leadership is often taught as an endless exercise in emotional babysitting, corporate theatre, and navigating unpredictable human friction.

​If you hate leading people, it is usually because standard management paradigms are designed for extroverts who thrive on nuance, office politics, and subtext. For brains wired to optimize physical or digital systems, maintain signal integrity, and build things with absolute determinism, this “human static” is pure exhaustion. Systems don’t lie, schematics don’t have hidden emotional agendas, and code doesn’t try to manipulate you.

​When you just want to design, build, and fix things in peace, dealing with resistant colleagues, saboteurs, or bureaucratic bottlenecks feels like debugging faulty hardware with a blunt instrument. But when responsibility falls on your shoulders, how do you execute complex projects without burning out on human drama?

​You stop trying to “lead” and start treating human interaction like an API.

​1. Stop Managing People; Design Protocols

​You do not need to become a charismatic, cheerleading executive to get things built. Treat human interaction with the same strict determinism you apply to engineering architecture.

  • ​Define Unambiguous APIs: Give people clear, binary inputs and expect deterministic outputs. Eliminate vague expectations, emotional subtext, and guesswork.
  • ​Automate the Friction: Just as you use automated linting gates or version control to stop bad code from breaking a repository, set up rigid operational constraints so people don’t need your constant emotional intervention. When processes are clearly documented and transparent, human emotional interference drops drastically.

​2. Treat Toxic People Like Faulty Hardware

​In high-consequence environments—whether you are architecting broadcast infrastructure, managing multi-disciplinary engineering projects, or working in a machine shop—you will occasionally inherit team members who view your project as a threat to their status quo. Some may even cross the line into active sabotage out of fear of obsolescence or “Napoleon syndrome.”

​When this happens, emotional engagement is a trap.

  • ​Isolate and Diagnose: Do not get angry at a broken capacitor; you diagnose the failure, isolate it, replace it, or route around it. Apply that exact clinical detachment to toxic personnel.
  • ​Strip the Black Box: Insecure gatekeepers love to hoard information. Force architectural transparency. Mandate that all schematics, code, and documentation live in an open, version-controlled repository. Neutralizing their monopoly on knowledge strips away the currency they use to cause friction.

​3. Build Systems That Eliminate the Need for Managers

​The ultimate engineering solution to hating management is to design systems where nobody has to manage anyone.

  • ​Objective Review Gates: Replace single-point subjective sign-offs with distributed, multi-person, or automated technical review boards. When approvals rely on objective compliance rather than one person’s ego or mood, gatekeepers lose their leverage.
  • ​Self-Documenting Workflows: Build self-documenting workflows where progress is self-evident. If a project is structured correctly, the architecture speaks for itself, and people either conform to the standards of the system or eject themselves from it naturally.

​The Bottom Line

​You don’t have to love people, and you certainly don’t have to love “leadership” as it’s sold in corporate seminars.

​You just have to build the framework that lets the work get done. Protect your hyperfocus, guard your energy, and let the clarity of the system do the heavy lifting.

Why Modularity is Software’s Hardest Problem

Why Modularity is Software’s Hardest Problem (And Why LLMs Are Built to Solve It)

If you ask a seasoned engineer what the hardest part of software engineering is, they won’t say writing algorithms, learning syntax, or configuring databases. They will tell you it is modularity—deciding where to draw the lines between different pieces of code.

For beginner developers, modularity often feels like an abstract rule teachers or senior devs harp on: “Keep your functions small,” “Don’t repeat yourself,” or “Separate your concerns.” But as applications grow from a few hundred lines into massive production systems, modularity becomes the thin red line keeping your codebase from collapsing into a giant bowl of spaghetti.

Surprisingly, while humans struggle immensely with drawing these boundaries, Large Language Models (LLMs) are uniquely brilliant at it.

Why Modularity is Unnaturally Hard for Humans

Human brains are incredible at depth, but terrible at scale. When writing code, we suffer from cognitive tunnel vision:

  1. The Curse of Context: When you are heads-down building a feature, it is easy to let two unrelated things bleed together. You need a database value inside a UI component, so you just query the database right inside the button click handler. It works today, but it creates a hidden trapdoor for tomorrow.

  2. Coupling vs. Cohesion: True modularity requires high cohesion (keeping related things together) and low coupling (preventing unrelated things from depending on each other). Predicting how a change in module A will ripple into module B requires mental simulation that quickly overwhelms working memory.

  3. The Inertia of Monoliths: Refactoring a messy file feels risky. It is always easier to add one more if statement to an existing function than to pause, step back, and redesign the architecture. Over time, codebases rot because proper modularity requires relentless, exhausting discipline.

Why LLMs Excel at Modularity

If humans find boundaries exhausting, why do AI coding assistants and LLMs slice up codebases so cleanly? It comes down to how they “think” and what they have seen.

1. They Have Read Every Architecture Ever Written

An LLM has processed billions of lines of open-source repositories, design patterns, and enterprise codebases. It doesn’t have personal fatigue or emotional attachment to a messy file. When asked to design a system, it defaults to statistical patterns of ideal modularity—pulling from decades of collective engineering wisdom on how to separate concerns cleanly.

2. Pattern Matching Over Pure Abstraction

When you ask an LLM to refactor a monolithic file into modular pieces, it doesn’t “reason” about architecture the way an architect does; instead, it pattern-matches responsibility boundaries. It instantly recognizes: “This chunk handles HTTP routing, this chunk handles data validation, and this chunk handles SQL queries.” It carves them apart into distinct files (routes.ts, validator.ts, db.ts) with crisp, well-typed interfaces because those boundaries are deeply embedded in its training data.

3. Zero Emotional Resistance

An LLM will never look at a 1,500-line file and think, “Ugh, rewriting this will take too long, I’ll just patch it.” It treats code purely as a text-transformation problem. It can completely restructure a messy component into a pristine, multi-file module in seconds without taking shortcuts.

The Takeaway for Beginner Engineers

Modularity is hard because it forces you to design for the unknown future rather than the immediate present.

The secret superpower of working with AI tools isn’t just letting them write code for you—it’s using them as an architectural mirror. When you find yourself writing a sprawling, messy file, ask an LLM to break it down into modular components and explain why it drew the lines where it did. By studying how the model isolates responsibilities, you train your own engineering intuition for where software boundaries should live.

Be a Nerd, Not a Bird: The Case for Depth in a Culture of Shortcuts

Be a Nerd, Not a Bird: The Case for Depth in a Culture of Shortcuts

We live in a culture obsessed with velocity. From 30-second video clips and summarized book chapters to AI-generated answers that require zero synthesis, modern life is engineered to help us skim the surface of everything while retaining almost nothing. We want the credential without the coursework, the output without the compilation time, and the victory without the struggle.

It is a world built for birds—creatures that fly high above the landscape, catching brief glimpses of everything, touching down only long enough to grab what is easy, and then moving on to the next bright, shiny object.

But every once in a while, a kid looks up from a workbench, a book, or a tangled mess of code and cuts straight through the noise with a piece of profound wisdom: “Be a nerd, not a bird.”

The Anatomy of the Bird

What does it mean to be a “bird” in the modern intellectual landscape?

Birds are the shortcut artists. They are the ones who read the SparkNotes instead of the novel, copy the code snippet from Stack Overflow without understanding the memory leak it introduces, and cheat on the test just to secure the metric. Their primary goal is optimization for compliance, not comprehension.

On the surface, the bird looks efficient. They glide over heavy texts, hit deadlines by the skin of their teeth, and can bullshit their way through a surface-level conversation about almost any topic. But their mental architecture is made of balsa wood.

When a real crisis hits—when the production server goes down at 3:00 AM, when an unexpected edge case shatters their assumptions, or when they are handed a problem that cannot be solved by a multiple-choice guess—the bird panics. Because they never built the foundation, they have nothing to fall back on. They spent their lives flying above the work, and now they have nowhere to land.

The Power of the Nerd

The nerd, on the other hand, is entirely unfazed by the glamour of the flight. They are down in the trenches.

To be a nerd is to be radically curious. It means looking at a system—whether it’s a vintage mechanical watch, a complex philosophy text, or a recursive algorithm—and refusing to look away until you understand the underlying mechanics. Nerds read the supplementary material. They dig into the errata sheets. They look at a failure not as an annoyance to be bypassed, but as a diagnostic puzzle begging to be solved.

While the bird asks, “What do I need to click to make the error go away?” the nerd asks, “Why did the state machine enter that invalid state in the first place?”

This distinction matters because depth compounds. A person who understands first principles can adapt to any new technology, any sudden market shift, or any complex challenge. They don’t just memorize solutions; they manufacture them.

Extracting Signal from Every Experience

The phrase “be a nerd, not a bird” is more than just a clever playground aphorism—it’s an operating philosophy for life. It tells us that true satisfaction doesn’t come from getting away with the shortcut. It comes from the quiet, sometimes grueling satisfaction of understanding how things actually work.

Every single experience we encounter is an opportunity for diagnostic depth. We can choose to skim the surface, nod along, and collect cheap wins. Or we can dive deep, get our hands dirty, and build something that lasts.

Next time you’re faced with a choice between the easy exit and the deep dive, remember which creature you want to be. Stop flying in circles. Land on the problem, open it up, and start building from the metal up.

ps5 controller in rust

Architectural Specification & Implementation Thesis: Deterministic Multi-Modal Real-Time Control & Audio Interfacing with the Sony PlayStation 5 DualSense Controller in Rust

1. Executive Summary & System Architecture Overview
Interfacing modern hardware peripherals like the Sony PlayStation 5 DualSense controller in a low-level, systems-programming environment (specifically bare-metal or systems-level Rust) requires navigating a fundamental architectural dichotomy: dual-subsystem routing.
The DualSense does not present itself to a host operating system as a monolithic driver endpoint. Instead, the OS partitions its functionality into two distinct hardware abstraction layers:
* The Audio Subsystem (USB Audio Class / UAC): The controller’s built-in microphone array, 3.5mm headset jack, and internal mono speaker appear to the host kernel (ALSA, PulseAudio, PipeWire, WASAPI, CoreAudio) as standard USB sound cards. Audio input and output streams operate via continuous, low-latency PCM buffers managed by host audio drivers.
* The Control & Telemetry Subsystem (Human Interface Device / HID): Button states, analog sticks, capacitive touchpads, adaptive trigger motors, LED lighting matrices, and the 6-axis IMU (gyroscope and accelerometer) communicate via raw USB or Bluetooth HID feature reports.
┌────────────────────────────────────────────────────────────────────────┐
│ DualSense Hardware Unit │
├───────────────────────────────┬────────────────────────────────────────┤
│ UAC Audio Interface │ HID Control Interface │
│ (Mic Input & Speaker Output) │ (Buttons, Triggers, 6-Axis IMU) │
└──────────────┬────────────────┴───────────────────┬────────────────────┘
│ │
▼ ▼
┌──────────────────────────────────────┐
│ │
▼ ▼
┌───────────────────────┐ ┌───────────────────────┐
│ `cpal` Engine │ │ `hidapi` Engine │
│ (Duplex PCM Streams) │ │ (HID Input Reports) │
└──────────┬────────────┘ └──────────┬────────────┘
│ │
▼ (Lock-Free SPSC Ring Buffers) ▼ (Worker Threads)
┌───────────────────────────────────────────────────────────────────────┐
│ Rust Application Processing Core │
│ (Voice Activity Detection, Kinematics, Command Parser) │
└───────────────────────────────────────────────────────────────────────>

To build a deterministic, zero-allocation real-time engine in Rust, we must decouple these subsystems into isolated asynchronous worker threads bound together by lock-free Single-Producer Single-Consumer (SPSC) ring buffers. This prevents jitter, thread contention, and audio dropouts under heavy telemetry polling loads.
2. Subsystem 1 — Bidirectional Full-Duplex Audio Pipeline
Audio capture and playback on the DualSense require precise sample-rate management (typically native 48kHz stereo/mono) and strict buffer management to prevent hardware underruns and overflows.
2.1 The Capture Pipeline (Microphone / Headset Input)
The host audio callback runs on a high-priority real-time thread managed by the audio backend (cpal). Inside this callback, any blocking operation, memory allocation, or syscall will cause audible dropouts (“pops” and “clicks”).
To eliminate this, incoming PCM samples are pushed immediately into a lock-free ring buffer (ringbuf crate). A separate background worker thread consumes these samples, evaluates Root-Mean-Square (RMS) energy for Voice Activity Detection (VAD), and dispatches speech payloads to local command parsers.
2.2 The Streaming Pipeline (Speaker / Headset Output)
Conversely, audio generated by text-to-speech (TTS) engines, network streams, or synthesized feedback cues is pushed into an output ring buffer. The cpal hardware callback drains this ring buffer just-in-time to feed the controller’s digital-to-analog converter (DAC). If the ring buffer runs dry due to a stuttering application thread, the callback safely injects zero-voltage silence to prevent buffer corruption.
3. Subsystem 2 — High-Frequency IMU & HID Telemetry Decoding
The DualSense houses an onboard 6-axis Inertial Measurement Unit comprising a 3-axis accelerometer and a 3-axis gyroscope streaming at rates up to 250Hz.
3.1 Raw USB Report Parsing
When connected via a wired USB-C link (strongly recommended over Bluetooth to avoid RF bandwidth saturation when running simultaneous duplex audio and high-rate motion reports), the controller emits standard 64-byte USB input reports starting with Report ID 0x01.
Extracting raw telemetry requires parsing 16-bit little-endian signed integers from precise byte offsets:
* Gyroscope (Pitch, Yaw, Roll): Bytes 16 through 21.
* Accelerometer (X, Y, Z): Bytes 22 through 27.
4. Unified Production-Grade Rust Implementation
The following complete, compilable Rust program integrates HID IMU polling, bidirectional audio capture, audio chunk streaming, and lock-free ring buffering into a single thread-safe engine.
Cargo Dependencies (Cargo.toml)
[package]
name = “dualsense_thesis_engine”
version = “0.1.0”
edition = “2021”

[dependencies]
cpal = “0.15”
ringbuf = “0.3”
hidapi = “2.4”
anyhow = “1.0”

Complete Implementation (src/main.rs)
use cpal::traits::{DeviceTrait, HostTrait, StreamTrait};
use cpal::{StreamConfig};
use hidapi::HidApi;
use ringbuf::HeapRb;
use std::sync::atomic::{AtomicBool, Ordering};
use std::sync::Arc;
use std::thread;
use std::time::Duration;

const VENDOR_ID_SONY: u16 = 0x054C;
const PRODUCT_ID_DUALSENSE: u16 = 0x0CE6;

/// Parsed 6-axis IMU telemetry frame
#[derive(Debug, Default, Clone, Copy)]
pub struct DualSenseIMU {
pub gyro_pitch: i16,
pub gyro_yaw: i16,
pub gyro_roll: i16,
pub accel_x: i16,
pub accel_y: i16,
pub accel_z: i16,
}

/// Comprehensive Multi-Modal DualSense Engine
struct DualSenseEngine {
sample_rate: u32,
channels: u16,
is_running: Arc,
}

impl DualSenseEngine {
fn new() -> Self {
Self {
sample_rate: 48000,
channels: 2,
is_running: Arc::new(AtomicBool::new(true)),
}
}

/// Helper to locate DualSense audio input and output sound cards explicitly
fn find_dualsense_audio_devices() -> (cpal::Device, cpal::Device) {
let host = cpal::default_host();
let mut input_dev = None;
let mut output_dev = None;

if let Ok(devices) = host.input_devices() {
for device in devices {
if let Ok(name) = device.name() {
if name.contains(“DualSense”) || name.contains(“Wireless Controller”) {
input_dev = Some(device);
break;
}
}
}
}

if let Ok(devices) = host.output_devices() {
for device in devices {
if let Ok(name) = device.name() {
if name.contains(“DualSense”) || name.contains(“Wireless Controller”) {
output_dev = Some(device);
break;
}
}
}
}

let input = input_dev.unwrap_or_else(|| {
host.default_input_device().expect(“No default audio input device found”)
});
let output = output_dev.unwrap_or_else(|| {
host.default_output_device().expect(“No default audio output device found”)
});

(input, output)
}

pub fn run(&mut self) -> Result<(), Box> {
println!(“Initializing DualSense Multi-Modal Real-Time Engine…”);

let (input_device, output_device) = Self::find_dualsense_devices();
println!(“-> Audio Input Device: {}”, input_device.name()?);
println!(“-> Audio Output Device: {}”, output_device.name()?);

let config: StreamConfig = StreamConfig {
channels: self.channels,
sample_rate: cpal::SampleRate(self.sample_rate),
buffer_size: cpal::BufferSize::Default,
};

// —————————————————————–
// Ring Buffer Setup (Lock-Free SPSC)
// —————————————————————–
let rb_capacity = (self.sample_rate as usize) * (self.channels as usize) * 5; // 5s headroom

// Input Ring Buffer (Mic Capture -> VAD Processor)
let in_rb = HeapRb::::new(rb_capacity);
let (mut in_producer, mut in_consumer) = in_rb.split();

// Output Ring Buffer (Stream Generator -> Controller Speaker)
let out_rb = HeapRb::::new(rb_capacity);
let (mut out_producer, mut out_consumer) = out_rb.split();

// —————————————————————–
// Build & Start CPAL Input Stream (Microphone)
// —————————————————————–
let input_stream = input_device.build_input_stream(
&config,
move |data: &[f32], _: &cpal::InputCallbackInfo| {
let _ = in_producer.push_slice(data);
},
|err| eprintln!(“Audio input error: {}”, err),
None,
)?;
input_stream.play()?;
println!(“-> Microphone capture stream active.”);

// —————————————————————–
// Build & Start CPAL Output Stream (Speaker)
// —————————————————————–
let output_stream = output_device.build_output_stream(
&config,
move |data: &mut [f32], _: &cpal::OutputCallbackInfo| {
let popped = out_consumer.pop_slice(data);
for sample in &mut data[popped..] {
*sample = 0.0; // Fill underrun with silence
}
},
|err| eprintln!(“Audio output error: {}”, err),
None,
)?;
output_stream.play()?;
println!(“-> Speaker output stream active.”);

// —————————————————————–
// Spawn Background Worker Threads
// —————————————————————–
let flag_vad = Arc::clone(&self.is_running);
let vad_handle = thread::spawn(move || {
let mut chunk = vec![0.0f32; 512];
while flag_vad.load(Ordering::Relaxed) {
let count = in_consumer.pop_slice(&mut chunk);
if count > 0 {
let rms = calculate_rms(&chunk[..count]);
if rms > 0.02 {
println!(“[VAD] Voice command energy detected! RMS: {:.4}”, rms);
}
}
thread::sleep(Duration::from_millis(5));
}
});

let flag_stream = Arc::clone(&self.is_running);
let sample_rate = self.sample_rate;
let stream_handle = thread::spawn(move || {
let mut seed = 0usize;
while flag_stream.load(Ordering::Relaxed) {
let chunk = generate_synth_tone(sample_rate as usize, 2, seed);
let mut pushed = 0;
while pushed < chunk.len() && flag_stream.load(Ordering::Relaxed) { let n = out_producer.push_slice(&chunk[pushed..]); pushed += n; if n == 0 { thread::sleep(Duration::from_millis(10)); } } seed += 1; thread::sleep(Duration::from_millis(100)); } }); let flag_imu = Arc::clone(&self.is_running); let imu_handle = thread::spawn(move || { let hid_api = match HidApi::new() { Ok(api) => api,
Err(e) => {
eprintln!(“[IMU] HID initialization failed: {}”, e);
return;
}
};

let device = match hid_api.open(VENDOR_ID_SONY, PRODUCT_ID_DUALSENSE) {
Ok(dev) => {
println!(“[IMU] Connected to DualSense HID telemetry interface.”);
dev
}
Err(e) => {
eprintln!(“[IMU] Device not found over HID: {}. Ensure wired USB connection.”, e);
return;
}
};

let mut buf = [0u8; 64];
while flag_imu.load(Ordering::Relaxed) {
match device.read_timeout(&mut buf, 10) {
Ok(n) if n > 0 => {
if let Some(imu) = parse_hid_imu_report(&buf[..n]) {
// Telemetry available for kinematics or gesture routing
// println!(“Gyro [P: {}, Y: {}, R: {}]”, imu.gyro_pitch, imu.gyro_yaw, imu.gyro_roll);
}
}
Ok(_) => {}
Err(e) => {
eprintln!(“[IMU] Read error: {}”, e);
thread::sleep(Duration::from_millis(100));
}
}
}
});

println!(“\nEngine operational. Press Ctrl+C to exit.\n”);
loop {
thread::sleep(Duration::from_secs(1));
}
}
}

/// Compute Root Mean Square for Voice Activity Detection
fn calculate_rms(samples: &[f32]) -> f32 {
if samples.is_empty() { return 0.0; }
let sum: f32 = samples.iter().map(|s| s * s).sum();
(sum / samples.len() as f32).sqrt()
}

/// Generate synthesized sinusoidal test blocks for speaker streaming
fn generate_synth_tone(sample_rate: usize, channels: u16, seed: usize) -> Vec {
let chunk_size = sample_rate / 10; // 100ms blocks
let mut chunk = vec![0.0f32; chunk_size * (channels as usize)];
let freq = 440.0;

for (i, sample) in chunk.iter_mut().enumerate() {
let frame_idx = i / (channels as usize);
let t = (seed * chunk_size + frame_idx) as f32 / sample_rate as f32;
let env = (-((i % chunk_size) as f32 / chunk_size as f32) * 3.0).exp();
*sample = (t * freq * 2.0 * std::f32::consts::PI).sin() * 0.05 * env;
}
chunk
}

/// Decode raw HID USB input report for 6-axis IMU data
fn parse_hid_imu_report(report: &[u8]) -> Option {
if report.len() < 48 || report[0] != 0x01 { return None; } let gyro_pitch = i16::from_le_bytes([report[16], report[17]]); let gyro_yaw = i16::from_le_bytes([report[18], report[19]]); let gyro_roll = i16::from_le_bytes([report[20], report[21]]); let accel_x = i16::from_le_bytes([report[22], report[23]]); let accel_y = i16::from_le_bytes([report[24], report[25]]); let accel_z = i16::from_le_bytes([report[26], report[27]]); Some(DualSenseIMU { gyro_pitch, gyro_yaw, gyro_roll, accel_x, accel_y, accel_z, }) } fn main() { let mut engine = DualSenseEngine::new(); if let Err(e) = engine.run() { eprintln!("Fatal error: {}", e); } } 5. Engineering Considerations & Deterministic Optimization * Physical Layer Constraints: Operating over USB-C ensures uncompressed bi-directional 48kHz audio streams coexist alongside 250Hz HID IMU reporting without packet loss. Bluetooth stacks introduce significant scheduling jitter and bandwidth contention when attempting simultaneous duplex audio and high-rate feature reports. * Memory Safety: By leveraging ringbuf, memory allocation occurs strictly at initialization (HeapRb::new()), ensuring zero heap allocations inside real-time audio and telemetry callback loops.

Architecting and Auditing Large-Scale Software Systems: Navigating Multi-Repository Complexity, SDKs, and APIs

1. Introduction: The Anatomy of Large-Scale Software Decay

When a software project expands to hundreds of files, distributed across multiple Git repositories, interacting with disparate APIs and consuming or publishing complex SDKs, it crosses a critical threshold. The complexity of such systems exceeds human intellectual capacity, transforming software development from a creative endeavor into a high-stakes exercise in risk and entropy management.

As software evolves, physical laws guarantee an inexorable increase in disorder—a phenomenon known as software rot or technical debt. Without rigorous architectural governance, multi-repository projects degenerate into fragmented, brittle codebases where maintenance consumes the majority of engineering resources.

2. Common Pitfalls in Multi-Repository and Multi-Module Projects

In large projects spanning multiple codebases, developers routinely create self-inflicted wounds that sabotage long-term velocity:

Organically Grown Architectures (“Spaghetti Systems”): Systems that evolve haphazardly through ad-hoc patches rather than deliberate design accumulate orphaned code, overlapping modules, and uncoordinated logic.

Cross-Repository Duplication (DRY Violations): When code is split across dozens of repositories without a shared core or package registry, teams frequently reinvent identical validation, error handling, and business logic.

Leaky Abstractions Across APIs and SDKs: High-level abstractions that prematurely expose low-level details (such as raw database schemas, database maps, or vendor-specific exceptions) lock consumers into implementation specifics, causing widespread breakage when underlying systems change.

Uncoordinated Changes and “Broken Windows”: A single poorly designed module or an ignored compiler warning sets a cultural precedent. Soon, developers adopt the mindset that “the rest of this code is crap, so I’ll follow suit,” accelerating system-wide decay.

3. Audit Framework: Diagnosing Systemic Health

To rescue a large, multi-repo project from structural bankruptcy, engineering leadership must conduct systematic audits. Evaluate code health using the following criteria:

Coupling and Cohesion Metrics: Identify modules with high afferent (incoming) and efferent (outgoing) dependencies. High coupling means a local change triggers cascading failures across unrelated repositories.

Boundary Integrity Inspection: Verify whether external APIs and third-party libraries are isolated behind dedicated adapter layers, or if vendor exceptions and data structures permeate the core business logic.

Defect Discovery Rate Analysis: Track bug detection rates over release cycles. A healthy project exhibits a bell-shaped defect curve peaking mid-cycle; an out-of-control project features a long, unyielding tail of lingering bugs.

Duplication Audits: Search across repositories for duplicated validation rules, configuration parsers, and data models that violate the core principle: Every piece of knowledge must have a single, unambiguous, authoritative representation within a system.

4. Strategic Implementation Plan: Best Practices for Scale

To restore order across distributed repositories and large codebases, teams must implement structured engineering strategies rooted in Domain-Driven Design (DDD) and Agile craftsmanship.

Layered Architecture and Bounded Contexts

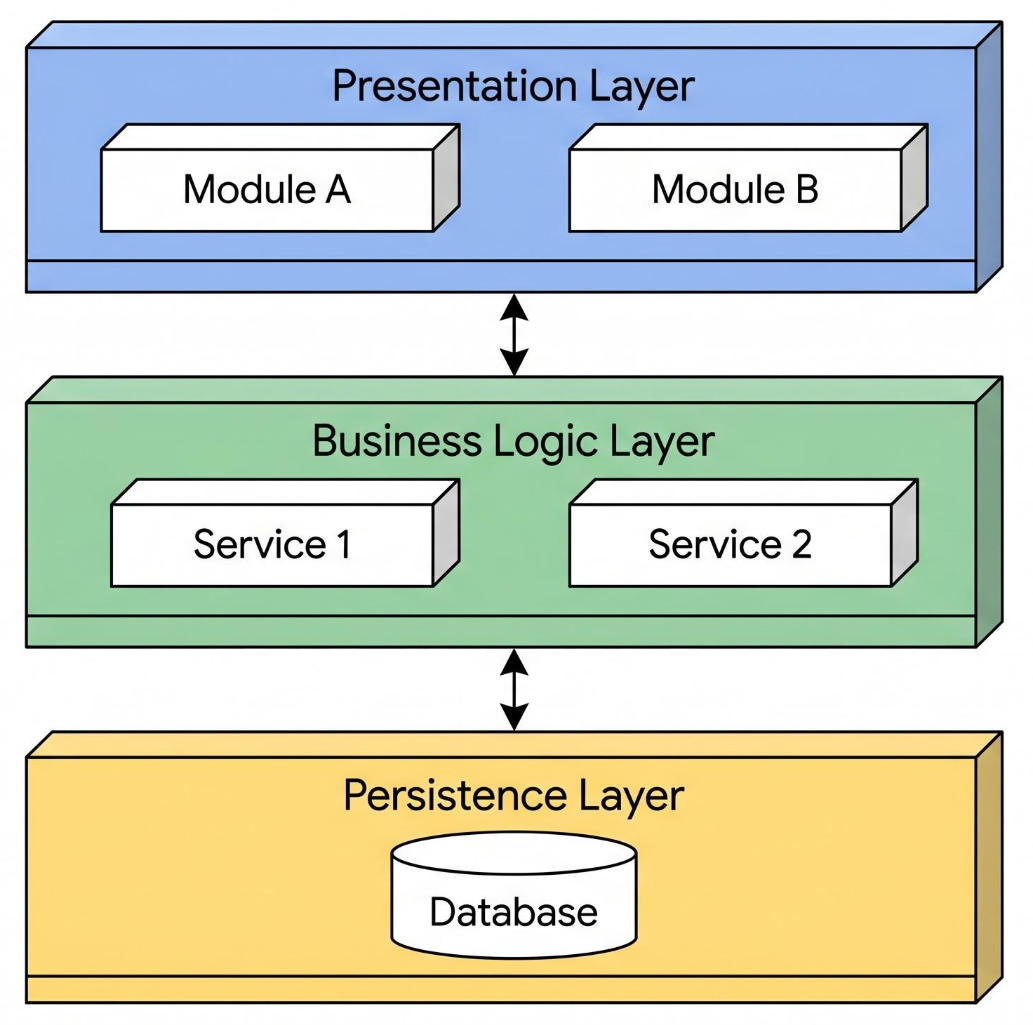
Isolate the Domain Model: Partition complex programs into distinct Layers. Concentrate all business logic in a dedicated domain layer, completely isolated from user interfaces, application orchestration, and infrastructure code.

Define Bounded Contexts: Total unification of a large enterprise model is neither feasible nor cost-effective. Explicitly define boundaries where specific models apply, utilizing Anti-Corruption Layers (ACL) or Published Languages when integrating separate subsystems.

Evolving Order: Avoid rigid, up-front enterprise architectures that act as straightjackets. Let large-scale structures evolve iteratively alongside deep domain understanding.

Version Control and Configuration Discipline

Never Use Manual Procedures: Rely entirely on automated shell scripts, pipelines, and version-controlled build processes to ensure identical build environments across all developer workstations.

Continuous Integration: Eliminate “big bang” integration events. Merge code and run automated test suites continuously—often multiple times a day—to catch integration friction immediately.

5. SDK and API Design Best Practices

When building APIs and SDKs for internal consumption or external clients, design decisions dictate long-term maintainability.

Intention-Revealing Interfaces

Program to an Interface, Not an Implementation: Hide concrete classes behind abstract interfaces or abstract base classes. This minimizes client-side dependencies and enables flexible refactoring.

Name for Intent, Not Implementation: Avoid exposing low-level mechanics like setters (setJustification(Paragraph.CENTERED)) or booleans that limit future states. Instead, use intention-revealing methods (centered()) and enumerated types to accommodate future expansions cleanly.

Boundary Wrapping and the Adapter Pattern

Wrap Third-Party APIs: Never let external vendor code or raw SDK clients permeate your application. Wrap third-party libraries inside local adapter classes to minimize dependencies, simplify mocking during unit tests, and provide a single migration point if the underlying library changes.

Keep Boundary Interfaces Small: Minimize what you expose at module boundaries. Well-defined modules feature narrow interfaces with few methods, drastically lowering coupling.

Managing Version Compatibility and Deprecation

Staged Upgrades via Deprecation: When breaking changes are mandatory, avoid sudden deprecations. Stage upgrades across multiple releases by marking code as deprecated while leaving it functional, giving client teams adequate warning to adapt.

Parallel Architectures: Provide backward and forward compatibility where possible (mirroring patterns like Java’s collection framework transitions) to ensure client systems do not break during routine upgrades.

6. Conclusion

Managing hundreds of files across multiple Git repositories, APIs, and SDKs requires more than raw coding talent—it demands uncompromising adherence to separation of concerns, low coupling, and rigorous design discipline. By treating architecture as an evolving, iterative practice rather than a static upfront document, and by isolating external dependencies behind clean boundaries, engineering teams can successfully engineer the illusion of simplicity and scale complex software sustainably.

Building a Custom Hammond B-3 MIDI Controller: 37 Keys, 9 Busbars, and Analog Drawbars

Converting a vintage Hammond B-3 manual into a modern MIDI controller is a masterclass in hybrid hardware design. The goal is ambitious: take a 3-octave manual (37 keys) outfitted with the original multi-contact busbar system—where each key features 9 distinct mechanical contacts corresponding to the organ’s harmonic drawbars—and translate that vintage mechanical action into a fully expressive, velocity-sensitive USB MIDI instrument.

Decoding the Busbar Architecture: Digital Scanning vs. Analog Sensing

A common point of confusion in vintage conversions is determining how to read the contacts. Because original Hammond key contacts are mechanical make/break switches that tap against physical busbars, they act strictly as binary switches rather than analog voltage sources. Consequently, dedicated Analog-to-Digital Converters (ADCs) are not required for the key contacts themselves.

Instead, managing 333 individual contact points (37 keys $\times$ 9 contacts) requires a high-density digital scanning architecture. Using multiplexers (such as the 74HC4067) or shift registers (like the 74HC165) configured in a matrix allows a microcontroller to scan every intersection efficiently without exhausting its GPIO pin footprint.

Deriving Velocity from Staggered Contacts

One of the most powerful aspects of retaining all 9 contacts per key is the ability to generate authentic velocity data without needing modern weighted hammer-action sensors. In a B-3 keybed, the 9 contacts are mechanically staggered. As a key is depressed, the contacts close sequentially. By measuring the time delta ($\Delta t$) between the initial contact closure and the final contact closure, a fast microcontroller can calculate press velocity and translate it into a standard MIDI velocity curve (0–127).

Integrating the Drawbars

While the key contacts rely on digital scanning, the physical drawbars require true analog sensing. Because slide potentiometers output a continuous variable voltage representing their physical position, they interface directly with analog multiplexers routed to the microcontroller’s ADC pins. Each of the 9 drawbars dynamically scales the gain or velocity response of its corresponding harmonic busbar channel, authentically replicating how a real tonewheel organ shapes amplitude across its harmonic spectrum.

The Recommended Hardware Stack

Bringing this project to life requires a robust processing and I/O ecosystem:

  • Microcontroller: A Teensy 4.1 is ideal, offering blistering clock speeds, abundant GPIOs, built-in ADC channels for the drawbar potentiometers, and native USB MIDI class compliance.
  • Key Scanning:74HC165 shift registers or custom matrix logic to reliably scan the 333 key-to-busbar junctions.
  • Drawbar Processing:74HC4067 analog multiplexers to multiplex the continuous resistance values from the drawbar pots into the microcontroller’s analog inputs.

By marrying vintage mechanical leaf-switch geometry with modern micro-controller scanning and analog scaling, this project bridges the gap between mid-century electromechanical design and contemporary music production.

1. Key Scanning: 74HC165 Shift Registers (37 Keys $\times$ 9 Busbars)

To handle 333 inputs efficiently, we daisy-chain 74HC165 8-bit parallel-in/serial-out shift registers. Since $333 \div 8 = 41.625$, you will need 42 shift registers chained together.

The Teensy 4.1 controls the whole chain using just 3 digital pins (SPI or bit-bang):

  • Teensy Pin 11 (MOSI / SCLK alternative or dedicated shift clock): Connected to the Clock (CP) pin of all shift registers in parallel.
  • Teensy Pin 12 (MISO): Connected to the Serial Out ($Q_7$) of the last shift register in the chain.
  • Teensy Pin 2: Connected to the Parallel Load ($\overline{PL}$ or $\overline{LD}$) pin of all shift registers in parallel.
  • Power & Ground:
    • Connect all shift register $V_{CC}$ pins to 3.3V (Teensy 4.1 logic is 3.3V tolerant; do not use 5V logic inputs directly on Teensy pins).
    • Connect all GND pins to system GND.

2. Drawbar Processing: 74HC4067 Analog Multiplexers (9 Drawbars)

A standard Hammond set has 9 drawbars. A single 74HC4067 16-channel analog multiplexer can easily handle all 9 drawbars (with 7 channels left over for future expansion, like presets or expression pedals).

  • Teensy Analog Pin (e.g., A0 / Pin 14): Connected to the SIG/COM (Common Output/Input) pin of the 74HC4067.
  • Address Control Pins (Binary Select):
    • Teensy Pin 4 $\rightarrow$ Address S0
    • Teensy Pin 5 $\rightarrow$ Address S1
    • Teensy Pin 6 $\rightarrow$ Address S2
    • Teensy Pin 7 $\rightarrow$ Address S3
  • Enable Pin ($\overline{E}$): Connected directly to GND (permanently enabled).
  • Power & Ground:
    • $V_{CC}$: 3.3V (matches Teensy ADC reference range).
    • GND: System GND.
    • VEE: System GND (since you are running on a single 3.3V supply).
  • Drawbar Connections:
    • Connect the wiper (variable pin) of Drawbar 1 to channel C0, Drawbar 2 to C1, …, up to Drawbar 9 to C8.
    • Connect one outer lug of each drawbar pot to 3.3V and the other outer lug to GND.

Master Teensy 4.1 Pin Mapping Summary

Teensy 4.1 PinFunction / ConnectionTarget Component
Pin 2Digital Output (Latch)Shift Register Parallel Load ($\overline{PL}$)
Pin 11Digital Output (Clock)Shift Register Clock (CP)
Pin 12Digital Input (Data In)Shift Register Serial Out ($Q_7$ of last chip)
Pin 4Digital Output (Address S0)74HC4067 Multiplexer S0
Pin 5Digital Output (Address S1)74HC4067 Multiplexer S1
Pin 6Digital Output (Address S2)74HC4067 Multiplexer S2
Pin 7Digital Output (Address S3)74HC4067 Multiplexer S3
Pin 14 (A0)Analog Input74HC4067 Multiplexer SIG/COM
3.3VPower OutputShift Register $V_{CC}$ & Multiplexer $V_{CC}$
GNDGroundCommon Ground Bus

Switching to an ESP32 is a fantastic choice, especially if you want built-in Wi-Fi MIDI (Apple MIDI Network) and Bluetooth LE MIDI alongside physical MIDI out.

Because the ESP32 operates at 3.3V logic (matching the Teensy requirement) and has robust processing capabilities, shifting the design over is straightforward. However, the ESP32’s pin architecture is a bit more flexible—and fragmented—than the Teensy, so assigning dedicated pins requires keeping its strappings and ADC limitations in mind.

Master ESP32 Pin Mapping Summary (Standard 38-Pin DevKit)

ESP32 PinFunction / ConnectionTarget Component
GPIO 23 (MOSI)SPI Data / Shift Register ClockShift Register Clock (CP)
GPIO 19 (MISO)SPI Data InShift Register Serial Out ($Q_7$ of last chip)
GPIO 5 (SS/CS)Digital Output (Latch)Shift Register Parallel Load ($\overline{PL}$)
GPIO 16Digital Output (Address S0)74HC4067 Multiplexer S0
GPIO 17Digital Output (Address S1)74HC4067 Multiplexer S1
GPIO 18Digital Output (Address S2)74HC4067 Multiplexer S2
GPIO 19 (Digital Output (Address S3)74HC4067 Multiplexer S3 (Wait—see note below)
GPIO 34 (ADC1_6)Analog Input74HC4067 Multiplexer SIG/COM
GPIO 1 (TX0) or CustomHardware UART MIDI Out5-Pin DIN MIDI Jack (via 220Ω resistors)
3.3VPower OutputShift Register & Multiplexer $V_{CC}$
GNDGroundCommon Ground Bus

(Note on ESP32 GPIO clashes: Standard ESP32 dev boards share pins if you aren’t careful. Let’s optimize the pinout specifically to avoid conflicts with SPI and ADC2).

Optimized ESP32 Pinout for Keybed & Drawbars

1. Key Scanning (74HC165 Shift Registers – 42 Chips)

You can use the ESP32’s hardware VSPI bus to blast through reading those 42 shift registers at high speed, keeping your loop times ultra-low for accurate velocity timing.

  • Clock (CP): GPIO 18 (VSPI SCK)
  • Serial Out ($Q_7$): GPIO 19 (VSPI MISO)
  • Parallel Load ($\overline{PL}$): GPIO 4 (General GPIO Output for latching)
  • Verification: Toggle GPIO 4 low then high, read the SPI bytes, and check that the bitstream updates instantly when a key is pressed.

2. Drawbar Processing (74HC4067 Multiplexer)

  • Analog Input (SIG/COM): GPIO 34 (Note: Use an ADC1 pin like GPIO 34, 35, 36, or 39. Avoid ADC2 pins because Wi-Fi disables ADC2 when active!).
  • Address Lines (S0–S3):
    • S0: GPIO 25
    • S1: GPIO 26
    • S2: GPIO 27
    • S3: GPIO 14
  • Verification: Sweep a drawbar from top to bottom and monitor the serial plotter or console to ensure the analog values smoothly scale from 0 to 4095 (ESP32 has 12-bit ADCs).

3. MIDI Out (Physical Jack)

  • Use Hardware UART2 (TX on GPIO 17, RX unused) connected to a standard MIDI out circuit (a 5-pin DIN port wired with a 220-ohm current-limiting resistor on pin 5, pin 4 to 3.3V through 220 ohms, and pin 2 to GND).

Moving this project to Rust on the ESP32 is a fantastic choice. Rust gives you the deterministic performance and zero-cost abstractions of C/C++ combined with memory safety—crucial when you are processing 333 digital inputs and 9 analog axes fast enough to calculate key-velocity deltas without jitter.

Because you want Wi-Fi MIDI alongside bare-metal scanning speed, the modern ecosystem utilizes esp-hal (for bare-metal peripheral control) paired with esp-wifi (for network stacks).

1. Recommended Cargo Dependencies (Cargo.toml)

To wire up your peripherals, timing, and Wi-Fi, your Cargo.toml will look something like this:

Ini, TOML

[package]
name = "hammond-esp32-midi"
version = "0.1.0"
edition = "2021"

[dependencies]
esp-hal = { version = "0.22", features = ["esp32", "embassy", "embassy-time-driver"] }
esp-wifi = { version = "0.11", features = ["esp32", "wifi"] }
embassy-executor = { version = "0.6", features = ["task-arena-size-32768", "arch-xtensa", "time", "integrated-timers"] }
embassy-time = { version = "0.3" }
embedded-hal = "1.0"
embedded-hal-async = "1.0"

2. Architecture & Rust Implementation Blueprint

Here is how the core architecture translates into idiomatic Rust using embassy for async task management or a tight polling loop for maximum velocity-timing precision.

A. Scanning the 42 Shift Registers (74HC165)

Because you have 333 contact points, reading them via hardware SPI (MISO, SCK) is lightning fast. You pulse the Parallel Load line (PL), then read 43 bytes over SPI.

Rust

use embedded_hal::digital::{OutputPin, InputPin};

pub struct KeyScanner&lt;SPI, PL> {
    spi: SPI,
    parallel_load: PL,
}

impl&lt;SPI, PL> KeyScanner&lt;SPI, PL> 
where
    SPI: embedded_hal::spi::SpiDevice&lt;u8>,
    PL: OutputPin,
{
    pub fn scan(&amp;mut self, buffer: &amp;mut [u8; 43]) -> Result&lt;(), &amp;'static str> {
        // 1. Latch the parallel inputs into the shift register chain
        self.parallel_load.set_low().map_err(|_| "Failed to set PL low")?;
        // Brief hardware delay or CPU nop if needed for pulse width
        self.parallel_load.set_high().map_err(|_| "Failed to set PL high")?;

        // 2. Shift out all 43 bytes (333 bits total)
        self.spi.read(buffer).map_err(|_| "SPI read failed")?;
        
        Ok(())
    }
}

B. Reading the Drawbars via Multiplexer (74HC4067)

To read the 9 drawbars, you cycle the address lines (S0–S3) from 0 to 8, set the multiplexer channel, and read the ADC.

Rust

pub struct DrawbarReader&lt;ADC, S0, S1, S2, S3> {
    adc_pin: ADC,
    s0: S0,
    s1: S1,
    s2: S2,
    s3: S3,
}

impl&lt;ADC, S0, S1, S2, S3> DrawbarReader&lt;ADC, S0, S1, S2, S3>
where
    ADC: embedded_hal::analog::Adc&lt;Word = u16>, // or ESP32 specific ADC trait
    S0: OutputPin,
    S1: OutputPin,
    S2: OutputPin,
    S3: OutputPin,
{
    pub fn read_drawbar(&amp;mut self, channel: u8) -> u16 {
        // Set address lines (S3, S2, S1, S0) based on channel (0-8)
        let _ = self.s0.set_state(((channel >> 0) &amp; 1) == 1);
        let _ = self.s1.set_state(((channel >> 1) &amp; 1) == 1);
        let _ = self.s2.set_state(((channel >> 2) &amp; 1) == 1);
        let _ = self.s3.set_state(((channel >> 3) &amp; 1) == 1);

        // Allow settling time for the analog mux switch
        cortex_m::asm::delay(20); 

        // Read ADC value (0 - 4095 on ESP32 12-bit ADC)
        // self.adc_pin.read() ...
        0 // Placeholder return
    }
}

C. Velocity Calculation Logic

To derive velocity from the staggered contacts, your main scanning loop tracks state transitions across time:

  1. Contact 1 Closes: Record timestamp $t_1$.
  2. Contact 9 Closes: Record timestamp $t_9$.
  3. Calculate Delta:$\Delta t = t_9 – t_1$.
  4. Map to MIDI: Scale $\Delta t$ inversely into a velocity curve (fast transit time = high velocity like 127; slow transit time = low velocity like 20).

Wi-Fi MIDI Integration

With esp-wifi, you can initialize an async Wi-Fi station stack, connect to your local network, and spawn an RTP-MIDI server session using standard UDP packets over port 5004. This allows your custom B-3 hardware to stream wireless MIDI straight into your DAW (Logic, Ableton, Reaper) with minimal latency.

software key commands

Schematic and CAD software rely on a unified operational model divided into six core functional command families: Placement/Insertion, Connectivity/Wiring, Spatial Manipulation, Attribute Inspection, Drafting Precision, and Display Navigation.

Across all 100 applications—from PCB packages like Altium and KiCad, to industrial control systems like AutoCAD Electrical and EPLAN, down to general-purpose diagramming engines—software designers deliberately map recurring ergonomic primitives to optimize speed. In general drafting tools (and Autodesk’s CLI heritage), commands prioritize multi-letter mnemonic abbreviations confirmed with Enter or Spacebar, whereas dedicated schematic capture packages favor single-key triggers or chained, modal hotkeys that execute immediately under the cursor without waiting for an entry confirmation.

The Common Schematic Command Families

1. Connectivity & Wiring Commands

  • W (Wire / Route Connection) – Initiates the drawing of an intelligent logical conductor or netline between pins or terminal endpoints (standard in KiCad, Altium P \rightarrow W, Cadence Virtuoso/Allegro, and Proteus).
  • AEWIRE or WD (AutoCAD Electrical Wire) – Draws an intelligent, self-breaking schematic wire that tracks gauge, layer, and wire numbering across sheets rather than treating lines as raw geometry.
  • L or N (Net Label / Alias) – Places a named alphanumeric identifier on an open pin or wire segment to establish logical connectivity without drawing long, messy cross-sheet runs.
  • TRIM / TR (AutoCAD Line / Wire Cut) – Cuts intersecting lines or wires back to boundary edges; in schematic environments, it maintains electrical integrity while breaking loop conditions.
  • J (Junction) – Inserts a physical node dot indicating that crossing wires are electrically bonded rather than passing over each other without connection.

2. Component Placement & Symbol Insertion

  • A / P / Insert (Add Component / Symbol) – Summons the component browser to drop resistors, integrated circuits, valves, or relays onto the schematic canvas (A in KiCad, P \rightarrow P in Altium, Insert in EPLAN).
  • AETEMP / LEC (AutoCAD Electrical Component Insert) – Launches the AutoCAD Electrical Icon Menu to insert standardized NFPA/IEC intelligent schematic symbols.
  • B / BLOCK & I / INSERT (AutoCAD Block Definitions) – Defines grouped vector artwork into reusable blocks (B) and inserts referenced library blocks into drawings (I).
  • P (Power Symbol / Rail) – Quick-inserts global ground references (GND), power rails (VCC, +24V, PE), or bus termination flags.

3. Spatial Manipulation & Alignment

  • Spacebar / R (Rotate 90°) – Rotates the currently floating or selected component by 90 degrees around its origin prior to placement.
  • X / Y (Mirror / Flip Horizontal & Vertical) – Mirrors a symbol across its horizontal or vertical axis to orient input/output pins logically without changing underlying pin assignments.
  • M / MOVE (Move / Detach Object) – Moves an entity freely to a new coordinate point (M in AutoCAD, Altium, and KiCad).
  • G / Ctrl + Drag (Rubberband Drag) – Moves a placed symbol while actively maintaining and stretching its attached wires, preventing circuit disconnects.
  • SCOOT (AutoCAD Electrical Inline Scoot) – Repositions an inline component along a wire or moves a whole ladder rung without severing wire connectivity.
  • RO / ROTATE (AutoCAD Free Rotation) – Rotates drawing elements around a defined basepoint.

4. Drafting Constraints & Snapping Controls

  • F3 / OSNAP (Object Snap) – Toggles geometric snapping modes (End, Mid, Intersection, Node) so lines meet connection targets accurately.
  • F8 / ORTHO (Ortho Constraint) – Constrains cursor movement to horizontal and vertical (90°) axes, ensuring clean, organized right-angle schematics.
  • F9 / G (Grid Snap) – Snaps cursor movement to the active drawing grid, ensuring pins fall exactly on wire connection nodes.
  • F12 (Dynamic Input) – Toggles cursor-attached input boxes in AutoCAD, displaying live dimension readouts and angle fields.

5. Inspection, Editing & Hierarchy

  • E / Q (Edit Properties / Inspector) – Opens the parameters dialog for the selected component (designator, footprint, terminal numbers, resistance/voltage ratings).
  • Ctrl + 1 (AutoCAD Properties Palette) – Displays the universal CAD property palette to adjust layer, color, text height, line type, and block attributes.
  • AEREDO / EC (AutoCAD Electrical Edit Component) – Accesses the full electrical tag, catalog lookup, description lines, and cross-reference records for an industrial symbol.
  • Tab (Pause to Edit / Variant Cycle) – In Altium, pauses an active placement tool to edit properties on the fly; in EPLAN, cycles through graphical variants A through H before placing a symbol.
  • Esc (Escape / Cancel Tool) – Universally aborts the current action, deselects elements, and returns the cursor to default pick mode.

6. Canvas & Document Navigation

  • Home / F / Z \rightarrow A (Zoom to Extents / Fit View) – Scales the active sheet or multi-tier workspace to display all drawn components within the viewport.
  • P / Pan (Middle Mouse Drag / Pan Tool) – Translates the viewport across large schematic sheets without changing the zoom level.
  • Ctrl + Z / Ctrl + Y (Undo / Redo) – Reverses or re-applies the previous drawing state or electrical pin assignments.

Computer Intelligence, Not Artificial Intelligence

​Knowledge vs. Intelligence

​Language shapes how we perceive reality, and few terms have created more confusion than “Artificial Intelligence.” Calling machine cognition “artificial” implies it is an imitation—a synthetic stand-in for the “real” thing. In practice, the mechanics powering modern systems are far more precise: it is Computer Intelligence (CI).

​To see why the distinction matters, consider the difference between what a machine stores and what it actually does with that data.

  • ​Knowledge is what you know. It is the library—the collection of facts, documents, datasets, and rules accumulated and stored on a shelf. A system can store billions of parameters, but on their own, they remain inert data.
  • ​Intelligence is how you fill in the blanks. It is not the library itself; it is the capacity to reason, connect dots that have never been placed together, and solve an unfamiliar problem.

​The Machine Filling in the Blanks

​A digital system does not merely retrieve stored encyclopedic facts like a traditional database. When presented with an incomplete question, messy context, or novel variables, a computer uses structured logic, statistical probability, and neural architectures to extrapolate. It figures out what belongs in the empty spaces.

​Because that reasoning is executed across silicon, math, and code rather than biological tissue, its substrate is the computer. The process itself is not a fake copy of thought—it is real computational problem-solving. Shifting the label from “Artificial” to Computer Intelligence removes the sci-fi mystique and grounds the technology in what it actually is: machines using what they know to bridge the gaps in what they don’t.

The Golden Rules of Docker & Kubernetes: Best Practices & Production Guidelines

This reference guide codifies the fundamental “golden rules” and production best practices for containerization with Docker and container orchestration with Kubernetes. Grounded in established cloud-native patterns and technical handbooks, these rules emphasize immutability, security, declarative management, high availability, and optimal resource utilization.


Part I: Docker Golden Rules

1. Maintain Single-Process & Decoupled Architecture

  • Rule: Design containers to run a single process or single functional service per container.
  • Rationale: Decoupling microservices allows individual components to scale independently and fail without cascading. Inter-container communication should be handled via defined networks or container linking rather than bundling multiple daemons into one image.
  • Key Practices: Avoid running init systems (like systemd or supervisord) inside containers unless absolutely necessary for host-emulation testing.

2. Treat Containers as Ephemeral & Immutable

  • Rule: Containers must be treated as short-lived, disposable entities.
  • Rationale: Runtime modifications inside a running container are lost upon restart and break deployment reproducibility.
  • Key Practices:
    • Never manually edit files inside a running container.
    • Store all persistent application state and dynamic data outside the container lifecycle using Docker Volumes or volume mounts.
    • Manage runtime configuration changes via environment variables (ENV).

3. Master Dockerfile Layer Optimization & Cache Management

  • Rule: Order Dockerfile directives strategically and combine related build steps.
  • Rationale: Docker images use union filesystems where every directive adds a read-only layer. Reordering directives maximizes caching efficiency, while combining commands reduces image overhead.
  • Key Practices:
    • Order by Change Frequency: Place instructions that change rarely (base image, system packages, app dependencies) near the top, and frequently changing code near the bottom.
    • Chain Commands: Combine system update and package installation commands into a single RUN line with cleanup (e.g., `RUN apt-get update && apt-get install -y

Pathology of heavy AI-assisted workflows: bureaucratic self-replication.

When an agent is given the capability to generate plans, manage backlogs, and track states, it optimizes for the metrics it can control—which means generating plans about plans. It mistakes administrative motion for actual engineering progress. You end up spending more cognitive bandwidth feeding the paper machine than building software.

Agile and Scrum do this to human teams; autonomous agents do it at 10x speed because they never get tired of writing markdown files.

The Clean Path: Less System, More Code

To break out of the loop and move from “less is less” to “better is better,” the system needs to be stripped down until the overhead outweighs the utility:

  • Kill the Backlog and the Funnel: Stop maintaining 300+ card corpora, multi-lane funnels, and gating systems. If a task isn’t small enough to fit in a single prompt and be executed immediately, it shouldn’t be tracked as a sprawling web of dependencies.
  • Direct-to-Disk Execution: Ditch the intermediary planning files (Documentation/10_Plans/) entirely when they start cross-referencing each other. Use a single active scratchpad or README for the current objective, execute the change, verify it with code, and delete the pad.
  • Code as the Only Source of Truth: As your own documentation notes, folder states and checkbox states inevitably drift from reality. The compiler, the test runner, and git status are the only status boards that cannot lie. If it isn’t in the code or a test, it doesn’t exist.
  • Asymmetric Context: Give the agent less overarching baggage and more direct access to the specific file or module it needs to touch. Narrow the context window to the immediate problem rather than feeding it the historical metadata of why 50 other plans failed.

The Illusion of Scaled Governance
The modern trap of AI-driven development is that agents love paperwork because generating markdown files requires zero friction. When a system balloons to 100 plans a day with cross-linking dependencies, it stops being a roadmap and becomes an autonomous bureaucracy. You end up spending more mental energy managing the planner than writing code, perfectly mirroring the worst administrative excesses of traditional agile and scrum processes.

The Danger of Stale Metadata
When folder states, checkbox counts, and filename prefixes become decoupled from reality, they actively mislead you. Corpus audits prove that unstarted work sits in progress while completed tasks remain unchecked, turning status boards into historical fiction. A check or a folder structure that cannot be independently verified against the actual working tree is worse than no tracking at all because it breeds false confidence.

The Authority of the Compiler
True software velocity relies exclusively on the immediate feedback loop of the compiler, the test runner, and the running container. Instead of maintaining sprawling funnels and complex dependency trees, you must force every verification back down to a raw, reproducible command with a definitive exit code. If a test or a typecheck cannot fail on purpose, it is not a check, and any system depending on it is built on sand.

The Minimalist Path Forward
The antidote to bureaucratic bloat is radical reduction: fewer files, narrower context windows, and immediate execution. By abandoning multi-lane funnels, massive backlogs, and self-generating metadata in favor of a single active task, you shift the system from managing work about work to simply shipping better code. Less bureaucracy doesn’t mean less progress; it means the energy finally goes where it belongs.

Autocle

Autocle (noun, portmanteau: automatic + article)

/ˈɔː.toʊ.kəl/

​A dynamically generated piece of long-form or editorial content synthesized automatically from fragmented user discussions, commentary, and crowd-sourced insights.

  • ​Mechanism: An engine aggregates scattered remarks, key talking points, and analytical observations from a thread or forum, extracts the core arguments, and restructures them into a cohesive, publication-ready article without manual authoring.
  • ​Key Characteristics:
    • ​Insight-Driven: Relies on authentic user engagement and community consensus rather than top-down reporting.
    • ​Automated Synthesis: Eliminates the manual work of drafting, transitioning, and synthesizing quotes.
    • ​Context-Preserving: Retains the nuance and perspective of the original commentary while adopting structured narrative formatting.

​Example: “The product release thread blew up with clever workarounds, so the community engine converted the top comments into an autocle summarizing the best setup tips.”

Combining two skills.

There is a quiet, vanishing geometry to the way things used to be built. Spend a few days in a workshop with Richard Hess, listening to him talk through the microscopic behaviors of a tape path, and you realize that a tape machine isn’t just an electronic box that happens to have moving parts—it is an intricate mechanical instrument where physics and signal path are entirely inseparable.

For decades, the world has been sliding away from this reality. We live in an era of surface-mount components, sealed modules, and software emulations where physical touch has been engineered out of daily life. But in the trenches of analog audio, and particularly in the specialized world of tape preservation and high-end mastering, the physical world still demands absolute obedience.

Lately, I’ve found myself standing at a wonderful intersection. By combining a lifelong obsession with audio, a deep love for mechanical machining, and a practical foundation in electronics design, I’ve found a path forward that feels almost anachronistic, yet desperately needed. I am stepping into the world of custom headblock mechanics—machining bespoke mounts, zero-backlash adjustment platforms, and engineering the precise spatial relationships required to make tape heads sing.

Richard’s mentorship underscored a fundamental truth: you can have the finest electronics in the world, but if your azimuth is off by a fraction of a micron, or if your headblock flexes under the tension of a 10.5-inch reel, your high frequencies vanish into phase cancellation. The art is entirely mechanical. It is about cutting custom clearance holes in vintage castings, designing kinematic adjustment linkages that don’t bind, and selecting materials that refuse to thermal-drift when a studio heats up. It is about hand-lapping, micro-adjusting, and treating a piece of aluminum like a Swiss watch movement.

There is a massive opportunity hidden in this niche. Studios and archivists are guarding aging Studers, Ampexes, and MCI transports like holy relics. They don’t just need service; they need custom mechanical evolution—tailored modifications, specialized head configurations, and modern engineering applied to vintage iron.

By marrying the tactile grit of machining with the exact science of audio and electronics, I get to build things that matter. It’s a craft where the chips flying off the mill directly translate to the air moving out of a studio monitor, bridging the physical and the sonic in a way very few people still know how to do.